It is certainly a transition time with the overnight temps dropping into the 70s and high 60s, while the daytime temps are moving below 100.
The brisk feel of early morning has me in a cooking and baking mode. So here are what is growing in the garden and coming out of the oven or off the stove this past week.
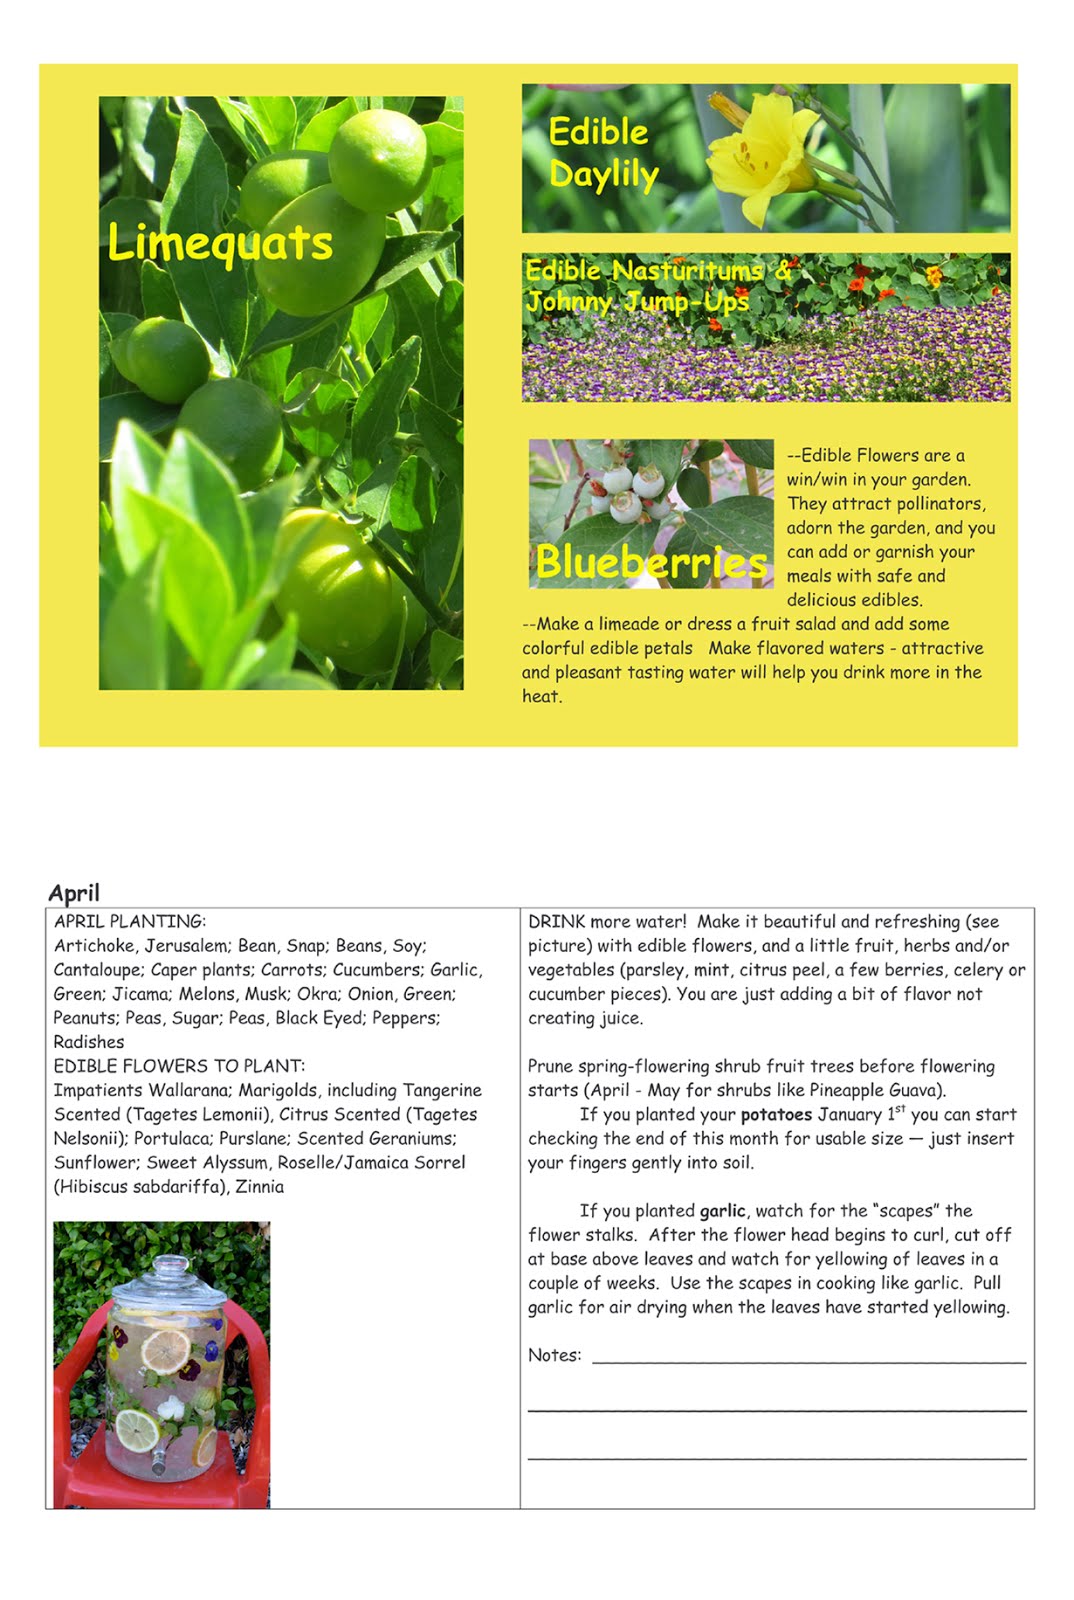
The Roselle (Hibiscus Sabdariffa) is putting out buds. This year I just trimmed the plants back since I can't use all of the wonderful "fruit" and leaves (I do dry the fruit) and needed more room for putting in more sugar peas and I need to get some kale and red romaine lettuce seeds in. The leaves, flowers and the "fruit" of the Roselle are all edible and filled with a ton of Vitamin C.


Then for dinner, I thawed the San Marzano tomatoes (I freeze cut in chunks) and started them slowly cooking down. I had purchased a package of cheese Tortellini (I was in the mood for pasta).


I started making the butter spread some years ago, because it is just easier to spread and cook with. Many recipes call for a bit of both oil and butter when cooking and this is already combined AND healthier than store bought. I whip it up in my bullet mixer. 1 stick of organic salted butter softened 1/3 cup of avocado oil (you can use oil of your choice) 1/8 teaspoon of sea salt. Put oil and salt in your blender, cut butter into chunks, add and blend. It produces a smooth and tasty blend. There is always some spread left in the container and I try to time making the blend when I want to cook up some pasta or veggies and add a bit of hot water, to the blender, shake and use the buttery water for cooking.
Biscuits - every recipe for a good homemade biscuit reminds you not to overwork the dough. Most recipes have you using something like Bisquick or some homemade variation of it.
I adapted my recipe from one which was created by the Southern Foodways Alliance for their cookbook. The recipe had appeared in a magazine but is no longer available. But I found it on google. Here is the page from google books and you can purchase the entire book from Amazon etc.
My Cream Biscuit Recipe
1 1/4 cups of well-chilled heavy cream
2 cups of all-purpose flour
3 (yes 3) teaspoons of baking powder
1 teaspoon of salt.
Optional: Dried or fresh herbs as desired
Preheat oven to 475 and position the oven rack in the middle. Spray your pan.
Sift all the dried ingredients together (flour, baking powder, salt) then stir in herbs and cream. Work quickly but do not overwork the dough. Gently pat dough into 6 rounds slightly flattened. Bake for 12 minutes but watch - may need 1 minute or so more, you are looking for the tops to just color and the bottoms to lightly brown.
Remove and cool on a rack.
Without herbs, these biscuits are great for strawberry shortcake!

My jam bread recipe came about when I realized just how much homemade jam I had. The cupboard was getting out of control. Many sweet cake/breads are made with fruit and some liquid. After experimenting (no problem eating the results) I came up with a good basic recipe. This bread will have a very moist center.
My Jam Bread
This makes two standard loafs
2 cups all purpose flour
1/2 teaspoon salt
1 teaspoon baking powder
2 eggs
1/4 cup sugar*
1/4 cup oil (I like avocado oil for this but you can use oil of your choice)
1 1/2 cups jam (NOT jelly -- if you want to use jelly you need to mix the jelly with enough cut up solid fruit to make a total of 12 ounces)
1 cup chopped walnuts
Preheat oven 350 and spray loaf pans - set aside
In one bowl sift flour salt and baking powder
In another bowl whip eggs to frothy, add sugar and oil and mix very well. Add jam and mix well.
Mix in flour until batter is well mixed, stir in nuts.
Pour into prepared pans and bake 40-45 minutes. Depending on jam used and other factors. The bread could take longer. A toothpick in will still be a bit sticky when done, but the bread should be a nice brown color but not burnt.
I have also experimented with "Canning" the breads in mason jars to make them shelf stable. You literally bake in the jar and cap immediately when it comes out of the oven. To test the safety of this I made two 18 ounce jars (sprayed inside) and filled about half full of batter. I capped immediately. I saved one for a month, while we enjoyed the other one as soon as it cooled. The reserved one was just fine 1 month later.
Back to the garden


And more of the "neighbors" stopped by. We have had about a dozen, give or take, quail stopping by regular for the last week. We had not seen them in a month or more. I think these may be many of the "teenages" we had coming by this spring and summer. Always a delight to see them.
I hope you are having fun in the garden and cooking up good things from it.
Have a great day!
Catherine
You can find my books and calendars for sale on the side bar. Don't miss the "herb planting chart" only $5 for the PDF file to have handy with info on 48 herbs and when to plant them here in the valley.
-- Catherine, The Herb Lady
If you enjoyed this post, subscribe below by entering your email, to get all my posts!
Disclaimer: Clicking on links on this blog may earn me a small commission if you purchase something. Your price does not change.